
This guide explains how to manage Timelines using the Manage Timelines page.
Requirements
-
Global Timelines: Administrator permissions required.
-
Project Timelines: Jira Project Administrator permissions required.
Accessing the Manage Timelines Page
To access and manage Timelines:
Info
Access methods differ for Global and Project-specific Timelines. For details, refer to the Timeline Pages article.
-
Click the Timeline Browser.
-
From the drop-down menu, select Manage Timelines at the bottom:
Viewing Timelines
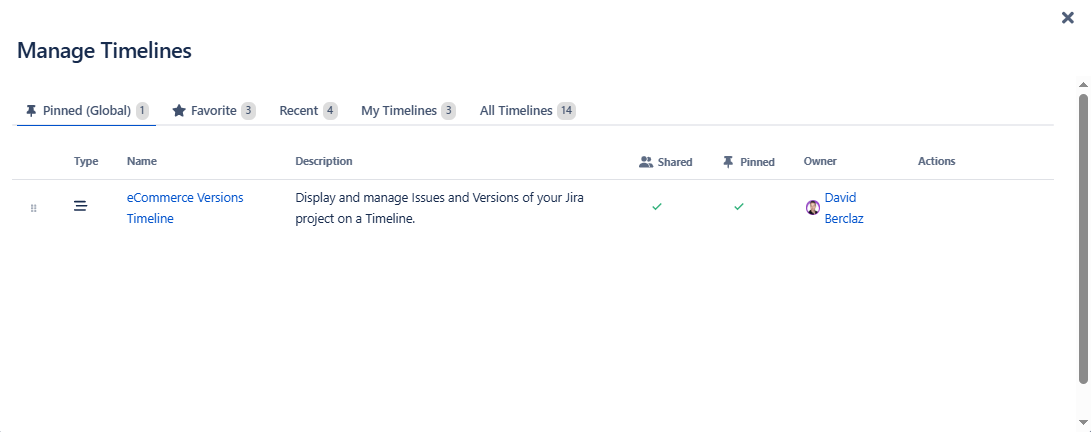
The Manage Timelines page categorizes Timelines into the following tabs:
-
Pinned (Global/Project)
-
Favorite
-
Recent
-
My Timelines
-
All Timelines
Managing Timelines
-
In the Managing Timelines page, search for the Timeline you want to manage.
-
Use the following columns:
-
Shared: Select the checkbox to share or unshare a Timeline.
-
Pinned: Select the checkbox to pin or unpin a Timeline.
-
Owner: Displays the Timeline owner. Some actions require ownership. Refer to the Security and Permissions article for details.
-
Actions: Hover over this column to:
-
Add or remove the Timeline from favorites.
-
Create a copy of the Timeline.
-
Edit the Timeline’s name, description, and sharing options.
-