Customizing Displayed Event Information
This guide will walk you through the steps on how to customize the layout of your Calendar Events and display the information that matters most to you.
Requirements
You must have one of the following permissions:
PLAN Calendar permission
EDIT Calendar permission
For more information, refer to the Setting Calendar Permissions documentation.
Customizing Displayed Event Information
Access the Timeline you want to customize.
In the Calendars section on the right of the screen, hover over the desired Calendar.
Click the Actions button (three horizontal dots) to open the Calendar Details dialog.
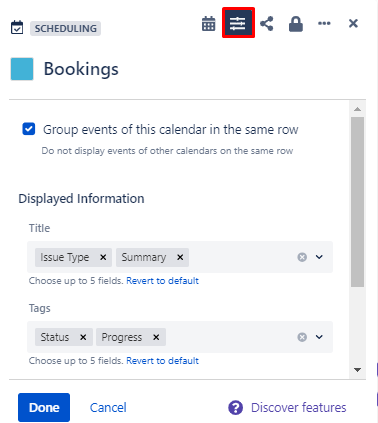
In the Calendar Details dialog, select the Displayed Information section at the upper-right corner:

Choose which fields to display in each of the three areas: Title, Tags, and Details. You can also rearrange the fields by dragging and dropping them.
Click Done to apply your changes.
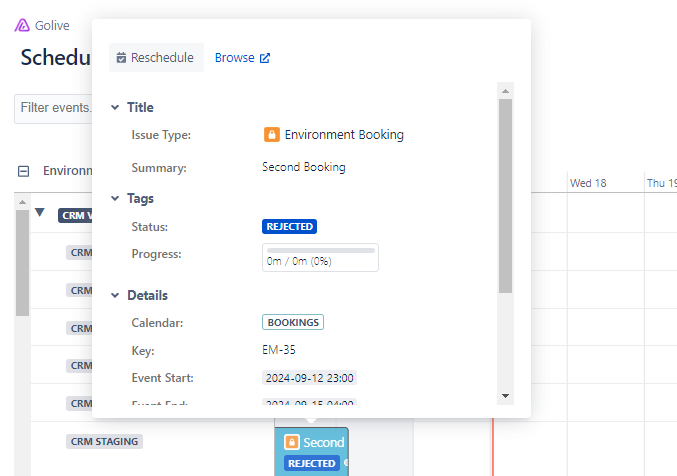
The selected fields will appear when clicking an Event on the Timeline, as shown below:
Info
Only fields with non-empty values will be shown in the Title and Tags areas.

